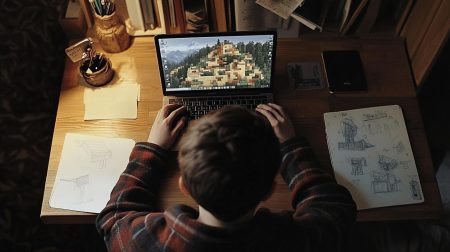
Have you ever wondered what it’s like playing Minecraft on your own server like YouTubers do?
There are many benefits to figuring out how to make a Minecraft server. With a private server, you’ll be able to set your own rules, play exclusively with friends you invite, and avoid meeting griefers.
In this guide, we’ll teach you how to make a Minecraft server, including steps like how to install Java, secure Minecraft Java edition, configure your server IP address, and other necessary steps.
Understanding Minecraft Servers
If you don’t fully understand what a server does, you’ll be confused about some of the steps you need to perform later on.
So, before we show you how to make a Minecraft server, we’ll help you familiarize yourself with what Minecraft servers are and why you would need one.
What Is a Minecraft Server?
If you’re new to the game, you’re probably wondering, “What is a Minecraft server?“
A Minecraft server is a custom Minecraft world where multiple people can play (as long as it’s up and running). Minecraft servers come in different forms, from a small private server to a large server.
Smaller private servers have different requirements from larger ones. You’ll need more processing power to host hundreds of players on top of mods and plugins instead of only hosting dozens.
Depending on how the server is set up and what mods or plugins are installed, the world can be as basic as a default single-player server or as crazy as a realistic texture pack-installed world.
Why We Need a Minecraft Server?
One reason why you need a dedicated server is to ensure continuity with your progress. We know how time-consuming it is to create intricate structures, so you want them to stay up even after logging out.
Another good reason to have your own Minecraft server is for co-op or competitive play with friends.
This is because NOBODY CAN ENTER personal or private Minecraft servers unless you send them a specific IP address and allow them to join — no griefers can enter at will.
Different Types of Minecraft Servers
Minecraft servers come in different types as well. There are publicly hosted servers that keep the server running at all times and personal servers that are hosted on the same machine you play on.
Preparations Before Starting the Process
Before starting the installation process, you should prepare a few things on your computer. These are mandatory or highly recommended precautions to ensure the entire process goes smoothly.
Understanding the Technical Requirements
If you’re already running the latest Minecraft version on your PC, making a server shouldn’t be a problem. Here are the main specs you need to avoid stutters and frequent lag:
- Windows PC with Windows 10 or 11
- Fast internet connection with at least 5 MB/s connection speed
- Consistent power supply so the PC doesn’t die as the server is running
- At least 2GB of RAM (most PCs today have at least 8)
These are the minimum requirements, but we recommend having more than this so you can run other programs in the background smoothly, like Discord or Twitch.
Latest Java Installation
Before making Minecraft servers, you must download Java. We highly recommend getting the latest Java version to avoid bugs and other issues.
Go to the bottom left corner of your Windows PC and type cmd to open the Windows Command Prompt. Type “Java-version” in the window to show if the latest version is installed.
If you don’t have the latest Java version yet and want to install the program from scratch, go to Oracle’s website. Look for the latest version of Java and follow the instructions to install it.
Understanding Minecraft Server Software
Minecraft server software uses a combination of Minecraft Java edition, Java files, and the server’s local IP address. These work together to ensure servers are easily created and accessed by the user.
Remembering your Minecraft server’s IP address is essential because that’s what you’ll be sending to your friends so they can join it. An IP address is more specific than just a server name.
You’ll also want to have basic knowledge of how to use and open command prompt and input command lines. Finally, keep all the files related to creating servers in a dedicated Minecraft server folder.
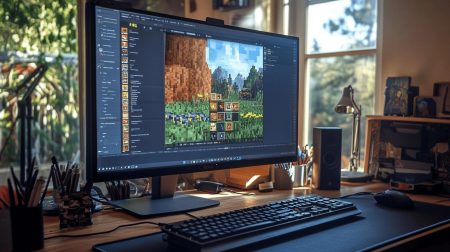
How to Make a Minecraft Server
Let’s discuss the steps to make a Minecraft server! While they may look complicated initially, they’re easy to do if you follow these instructions step-by-step.
NOTE: You can also check how to set up a Minecraft bedrock server.
Downloading Minecraft Server Files
Secure the Minecraft server jar file for the latest version of Minecraft. Click on this download link to be redirected to the Minecraft official download website.
Make sure to check the Minecraft server files and see if they’re the SAME VERSION as the one you’ve previously downloaded. If you download a different version, the process won’t work.
Create a new folder where you plan to store this file along with the other server configuration files. Then, move the same folder to an easily accessible location (e.g., the Documents folder.)
Configuring the Server
The next step is to open the command prompt window and enter the following command: cd C:\Users\YOUR USERNAME\Documents\Minecraft Server.
NOTE: Input the file pathway to your designated Minecraft server folder.
Then, start the server for the first time by inputting this line into the command prompt and press enter: java -jar server.jar –nogui. This generates all the files needed to start the Minecraft server.
Additionally, you must ensure you change the EULA file. Navigate your folders, look for eula.txt, and use a text editor to change the text document from eula=false to eula=true.
Changing the End User License Agreement text document or text file means you’ve READ and ACCEPTED the terms and conditions of running a Minecraft server.
Port Forwarding for Minecraft Server
Now that your server is up and running, you need to configure port forwarding for a Minecraft server. Port forwarding allows connections from outside your local network.
To do so, open your web browser and look for the port forwarding section on your router’s settings. Once you find it, switch it on or set it to enabled.
IMPORTANT NOTE: While port forwarding is generally safe, sharing your IP address with the public is still risky. Make sure to keep that information PRIVATE.
Creating Minecraft Server on Different Operating Systems
While most of this guide enumerates procedures for a Windows operating system, the Minecraft Java edition also works on MacOS and Linux.
Remember that Minecraft server requirements are pretty much the same on all of them but are inputted differently.
Setting Up Minecraft Server on Windows
Make a folder where you can store all your files, then download the Minecraft server jar file into the folder. Use the Windows key on your keyboard and search cmd to run the command prompt.
Run the jar file using the command file java -jar server.jar –nogui. This should create other jar files in your Minecraft server folder.
Similarly, make sure to change eula=false to eula=true in the eula.txt file after running the command prompt. Finally, enable port forwarding on your router settings.
You can also use a Windows batch file to execute command lines and make it easier. Create a new text file and rename it to start.bat. Edit the start bat file and input this line: java -Xms1G -Xmx1G -jar server.jar.
Starting a Minecraft Server on MacOS
Setting up a server differs slightly on MacOS, although some elements are similar. Instead of the command prompt, you’ll be using the Terminal window.
Create the MacOS version of the batch file (which is called a shell file). Make a new text/notepad document and rename it to start.sh, while entering the following command:
#!/bin/sh
cd “$(dirname “$0″)”
exec java -Xms1G -Xmx1G -jar server.jar
Save the file, open Terminal, then input the same cd “change directory” command as on Windows. Run this line to make the command executable: chmod a+x start.sh.
This should make it executable without opening a Terminal window each time you want to start the server.
Establishing a Minecraft Server on Linux
This follows a similar process to both Windows and MacOS. First, create a dedicated folder for the Minecraft server file, then download the latest Minecraft server file.
Use SSH command to download and run the latest server files using the command line chmod a+x start.sh. Then, run the server using this command: java -Xmx512M -Xms512M -jar minecraft_server.jar nogui.
To close the server, simply command “stop.” Don’t forget to change the port forwarding settings in your router settings too.
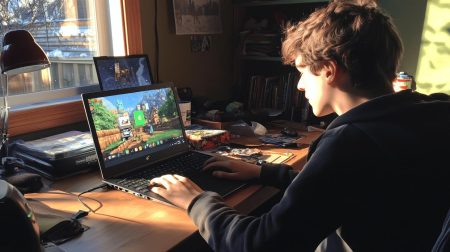
How to Setup a Multiplayer Minecraft Server
Now that you’ve created your server file and have the necessary server hardware, you must set it up so your friends can join and play with you.
Multiplayer Server Configuration
To go online, open Minecraft, go to Multiplayer, and click “Add Server.” This will prompt a window where you can input the server’s name and server address.
Either type localhost or 0 in the address since you’re already connected to your local network server, whether using WiFi or a wired connection.
After which, it should appear in the list of joinable servers. Select the server and click “join server” to launch.
Inviting Players to Your Server
If you want to create an online server and accept other players, enable port forwarding on your router’s settings. Then, click “add service,” “create new,” or similarly labeled buttons.
Input the following data into the server properties and fields that match up:
- Service/Port Name: Minecraft Server
- Start Port: 25565
- End Port: 25565
- Service Type: TCP/UDP
Then, enter your server IP address (you’ll need both IPv4 and IPv6), which you can find by typing ipconfig/all in your command prompt; confirm these settings and save.
After doing so, search “What is my IP address?” on your browser. This will give you your public IP address which you can share with others without compromising your privacy.
How to Create a Free Minecraft Server
If you’re curious as to how to make a Minecraft server for free, check out these important steps to set up a free Minecraft server.
Understanding Minecraft Server Hosting
Your friends will connect to an external IP address, which, in this case, is your local address. You can use your own PC and server IP address to host, but domain names are also an excellent way to go.
It’s a lot easier to remember, and your friends won’t need to keep the public IP address on their notepad and copy-paste it whenever they join.
You can also host on a server hosting service instead of giving your public IP address. This is ideal, especially if you want more people playing on the server simultaneously.
Step-by-Step Guide to Set Up a Free Minecraft Server
To set up a free server not directed to your own IP, go to websites like Aternos or Minehut. They’re hosting services that are easy to set up and use.
Follow their setup instructions, like creating an account with login details and entering their IP address instead of your own to create the server.
After this, copy and paste the IP address from the hosting service and send it to your friends. Now, you can play on a server that runs even when your PC is turned off.
Troubleshooting Common Minecraft Server Problems
Even if you get your Minecraft multiplayer server up and running, you might encounter some problems and be unsure how to fix them.
Here are a few common problems you might encounter, plus solutions for resolving such issues.
Resolving Connection Issues
If you can’t connect to your Minecraft world server, check your internet connection before checking Minecraft itself.
If everything works normally, check your server folder to see if anything has been changed, edited, or corrupted since the last time you played.
Some files in the server folder (like the .exe file) may get corrupted if your PC suddenly loses power and shuts down incorrectly while the server is running.
Fixing Lag in Minecraft Server
If your servers are laggy, but your internet speed is okay, check any mods or plugins you installed. Some of them may be too much for the system to handle.
Another thing you should check is the number of people currently playing on your server. Ten or less shouldn’t give you any problems, but 100 could be too much.
Server Crash Recovery
You can create automatic backups if you have the technical know-how and storage space. With this, you can load the last saved progress and continue playing as usual.
If your server crashes while playing and nothing is corrupted, try reloading the server and running the game. If your data is saved, you clearly dodged a bullet.
However, not many people can set up their own backups, but if you’re using hosting services like Aternos, they offer automatic backups for free.
We highly recommend using a hosting service that offers automatic backups to PREVENT any progress from being lost.
Optimization and Management of Your Minecraft Server
Even if your servers are running fine, there are things you can do to make them safer and run better.
Updating your own Minecraft server is also important to keep it virus and bug-free while supporting the latest versions.
Here are the important ones you must remember to ensure a seamless gaming experience with your Minecraft server.
Server Commands and Controls
One of the most convenient things to do is set up server commands and controls so you don’t have to enter the code and press enter every time you play.
You can make executable files you simply open to run commands independently, like the shell file on MacOS or batch files on Windows.
Plugins and Mod Installation
You can install cool mods to your server, such as texture packs to make your world look unique or functional plugins to add more gameplay elements.
You can find multiple mods, texture packs, and plugins all over the internet, and many of them are free and community supported.
Creating Server Backup
The easiest way to have server backups is to use hosting services like Aternos, which AUTOMATICALLY stores your progress.
Frequently Asked Questions
You might have related questions in mind after learning about Minecraft servers and how to create one. Here are answers to the commonly asked ones.
Can I Set Up a Minecraft Server for Free?
You can set up a server for free, whether using your PC and network or web hosting services like Minehut and Aternos.
Why Is My Minecraft Server Lagging?
A laggy server might be caused by many things. But usually, it’s because the mods or plugins installed are too heavy for the system graphics to handle. Try uninstalling some to see if it helps.
How to Add MODS to My Minecraft Server?
You can start adding mods to your Minecraft server by searching for downloadable mod files online and following the installation instructions, typically in the server folder you created.
How Do I Invite Friends to My Minecraft Server?
If you want to invite friends to play with you, share your public IP address with them. They only need to input the numbers into the appropriate multiplayer join window to access the server.
Why Is My Minecraft Server Not Connecting?
The Minecraft server may be the problem if your server can’t connect. But there’s also a possibility that some of your files in the dedicated folder are corrupted. Check the files for their integrity just to be sure.
Conclusion
Creating a Minecraft server is something you should do if you want a private virtual world to play Minecraft with your friends.
It’s a lot SAFER and more convenient and allows you to customize and be creative with your Minecraft experience. These benefits only get better as you play more.
Always remember that the Command or Terminal window is your best friend when setting up. You should also keep all your server configuration files in an accessible folder.
So, what are you waiting for? Start making your Minecraft server using the steps provided in this fool-proof guide. We guarantee that it’ll be as easy as ABC.