Computer hardware continuously dissipates heat, and over time it leads to performance issues. Fortunately, you can sort out this matter by installing an excellent cooling system like RGB fans, and it’s a great way to upgrade your PC. Want to know how to connect RGB fans to the motherboard?
However, it’s not as much easy as it sounds. RGB fans have different types, and here we have provided the procedure for installing various RGB fans. Track us below!
Types of RGB Fans
RGB fans have three common types:
1) 3-Pin RGB Fans
It is the most common type of RGB fan, also known as the DC fan. 3-Pin RGB fans are highly affordable, have proper functionality, and are pretty basic.
2) 4-Pin RGB Fans
4-GB fans have a whisper-quiet operation and are an excellent option for anyone looking for a high-end PC set-up. However, they are more expensive than 3-Pin RGB fans.
Here’s the separate post to differentiate between 3 Pin vs 4 Pin Fan Connector.
3) Motherboard Without Headers
This type of RGB fan is also a good option, but you will need some tools to connect it with the motherboard.
Important Points To Consider Before Connecting RGB Fans to Motherboard
Before jumping toward our main guide, let’s look at the essential points that you should consider before connecting RGB fans to the motherboard!
- Turn off your computer before installing RGB fans.
- Always keep the fans away from high-temperature devices like heaters.
- Don’t spill any type of liquid over RGB fans.
- Keep RGB fans and their parts in a safe and secure place.
- I prefer those RGB fans that come with mounting screws, so you don’t have to purchase these separately.
- Never keep your RGB fans near to the impeller.
- Do not play with the wiring or connections just for the sake of the experiment.
Now you are all set to connect RGB fans with the mobo, so let’s move towards our guide!
Check our post for How To Turn Off Computer Fan?
A Step By Step Guide to Connect RGB Fans To Motherboard
RGB fans are pretty versatile and a great solution to overcome the heating issue of PC. You need to follow different methods to connect various types of RGB fans with motherboard. Here we will individually discuss the process of connecting each RGB fan with the motherboard!
Connecting RGB Fans Without Headers
Firstly, we will discuss connecting RGB fans without headers to the motherboard since it’s quite different from others. You will need some tools, including a four-pin dual connector, RGB fan controller and a power cable. Then follow these steps:
- Open the case.
- You should have a 4-Pin dual connector to get this job done.
- Afterwards, insert the 4-Pin dual connector in the pin slot cable of the RGB fan.
- Now you have to connect the slotted cable with the RGB fan’s controller. Simply, insert one end of the slotted cable into another end of the RGB fan’s controller.
- Insert the other end of the controller into the power cable. The power cable comes with a plug connected to the power supply. It supplies power to the fan.
Congrats, you have connected the fan with the motherboard. Don’t forget to close the case at the end.
Check out our separate post for Best CPU Coolers for Ryzen 5 3600.
How Can You Connect 3 RGB Fans to Motherboard?
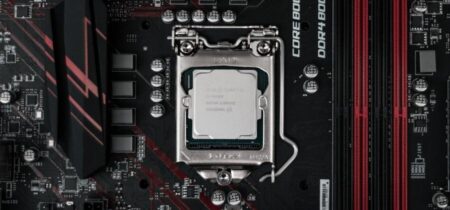
A 3 Pin fan connector has three holes on the front side. Its holes are square, and it contains three wires at the back. These pins are of different colours: yellow is for speed sensors, red for power, and black for ground.
Follow these steps to install 3-pin RGB fans:
- Read the instruction manual thoroughly.
- Then separate the case.
- The ports or slots come with a label. Hence, you can conveniently find the RGB mark.
- Now connect the RGB fan connecter on the upper side of your computer.
- Press the pieces tightly so they can get connected properly.
The connection is established now, and next, you have to place the RGB fans. You can use the rear or front side of the case for this purpose but don’t forget to pack them properly.
How Can You Connect 4 RGB Fans to Motherboard?
The 4 Pin RGB fans are bigger than the 3 Pin RGB and more powerful. These are best for high wattage computers since they can produce high RPMs. The best part? They work quietly without making noise, so, an excellent option for anyone looking for silent fans.
Here is the complete procedure for the installation of 4-Pin RGB fans!
- Firstly, read the instructions mentioned in the RGB fan’s instruction manual.
- Separate the case.
- Slots or ports will be labelled to find the RGB mark easily.
- Next, you have to insert the connector of 4-RGB fans with the motherboard’s fan header.
- Press the side pieces tightly, so they get connected properly.
The connection is established already, so just place the RGB fans. You can customize the RGB fan on the front or rear side of the case and close it properly afterwards.
Can You Connect RGB Fans to a Non-RGB Motherboard?
Yes, you can connect an RGB fan with a non-RGB motherboard. In that regard, you will need a controller for this purpose that also comes with an RGB fan strip.
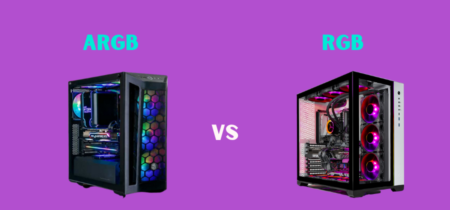
If you want to connect a non-RGB motherboard with an ARGB, that could be a challenging process. ARGB fans need a 3-pin 5V header for connecting their LED power. Unfortunately, the non-RGB motherboard doesn’t come with this header, making it difficult to connect them.
Check out our separate post if you want to know the difference between ARGB and RGB.
Here’s the short video tutorial for how to connect RGB fans to Motherboard.
Conclusion
Connecting the RGB fans with the motherboard is relatively easy, but you need to consider two things. Firstly, whether you are a beginner or an expert, you must read the instruction manual. Secondly, carefully identify the correct slots of your motherboard and then tightly connect all the cables with them.
If you still have any queries regarding RGB fans or motherboard, feel free to ask in the comment section below!