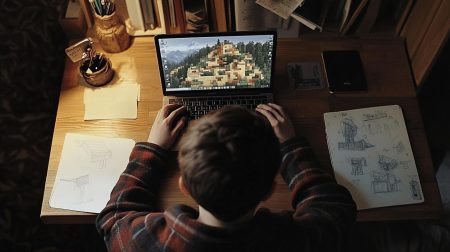
A Minecraft server is a world independently crafted and hosted by people in the Minecraft community. In this article we discuss how to create a Minecraft server for free!!
Creating one lets you completely control what happens in the world and handle admin commands. You can even use your server to test out mods in the Minecraft world!
Normally you need to pay for a private server to host players. Fortunately, you can set up a Minecraft Java edition server. Keep reading our guide to help you through the process.
What You Need to Know Before Creating a Minecraft Server
To create a great server, it’s good to start by understanding what a Minecraft server is first. The server’s creators, or administrators, use various commands to keep the server running smoothly.
Servers let Minecraft players play with other people online or via a local area network. If your goal is to have an online server, that means anyone with your external IP address can join.
Required Technical Skills
Creating your own server will require a basic understanding of computers and networking concepts.
- Using the command line interface
- Networking (IP, DHCP, ports)
- Your system and network configuration
- Your router configuration (for home setups)
These are major concepts you should know since you’ll be dealing with things like port forwarding and creating an automatic script through the batch file or shell script.
Hardware and Software Requirements
If you want to make a free Minecraft server, remember to check if you have the necessary specifications to run a server first. This ensures that the server runs smoothly the whole time.
- CPU: Intel or AMD (two cores or more), preferably 2 GHz or higher
- RAM: At least 2 GB RAM for 1-2 players, 5 GB RAM for 3-6 players, and 8 GB RAM for more than 6 players
- Operating system: Minecraft works on all major operating systems, but the additional resources differ per OS
- Bandwidth: 45 Mbit/s for more than six people
- Disk space: At least 2 GB for 1-2 players, 18 GB for 3-5, 35 GB for more than 6 players
Internet Connection and Bandwidth Considerations
You’ll need an internet speed of at least 10MB/s for a fast and lag-free server.
However, the typical usage when using the default view distance is 100MB per hour per connected client. Special mod packs and extra plugins that communicate client-side (like FTB and Spout) can result in extra usage.
Remember that you should utilize your bandwidth since just increasing your port speed won’t necessarily improve your clients’ gameplay.
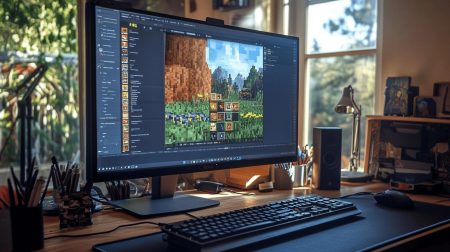
How to Create a Minecraft Server for Free
The process of making a Minecraft server for free can be confusing if you don’t pay careful attention to what you’re doing.
Below, we’ve outlined the major steps to making your own private Minecraft server.
Choosing the Platform (Windows, Mac, Linux)
How you set up your free Minecraft server depends on the platform you’ll plan to run it on.
Windows and Mac can be run at home, but using Linux means getting a Linux VPS hosting plan. With Linux, you won’t manage hardware or expose your private home network to the public.
They generally have the same major steps but differ in the details, such as commands.
Downloading the Server Setup
If you haven’t done so yet, download the Minecraft launcher through the official website. When inside the launcher, check if Minecraft: Java edition is selected in the left-hand column.
You should ensure that you’re running Minecraft’s latest version.
You’ll want to get the latest version of Java as well.
- If you’re using Windows, open the Windows Control Panel, look for Java, and click Update Now. Open the Windows command prompt and enter “java-version” to check the version number.
- Newer MacOS versions tend to already have Java installed. But if you have an older version of MacOS (OS X), you might have to download Java’s legacy version from the Apple website.
- If you’re on a Linux host, you’ll have to install Java first.
- You should be SSH’d into your host as the root user. Type the command “apt-cache search openjdk” and press enter to see the available OpenJDK packages that can install Java.
- Enter the command “apt-get update” to update the list of available packages.
- For this example, we’ll use openjdk-7-jdk (the OpenJDK 7 Development Kit). Install the chosen software package by entering the command “apt-get install openjdk-7-jdk”.
- Press “Y” to authorize the needed storage space for installation. Then, type the command “java -version” to see if it installed the latest version of Java.
You can download the Minecraft server software once you’ve installed or updated Java. For Mac and Windows users, follow the steps below.
- Download the official Minecraft server software from the Minecraft website. Ensure that the server version is the same as the Minecraft version you have installed.
- Save the server .jar file somewhere easy to access, like the default Downloads folder.
For Linux host users, follow the steps below.
- Make a location for the Minecraft server files first. Create a directory on your host, then change to that directory.
- Run the “wget” command within that directory to download the files (wget -O minecraft_server.jar).
- Install and run “screen” so the server keeps running even when you’re not connected with the following command: “yum install screen”.
Creating a Server Folder
When you start the Minecraft server software on Mac and Windows, the server files can go anywhere. So, you’ll want to make a dedicated folder for that.
- Make a new folder on your desktop or the Documents folder — anywhere that’s easy to access. Name it something clear, like “Minecraft Server.”
- Cut and paste or drag and drop the .jar file from where you downloaded it to that dedicated folder.
Customizing Settings
Toggle some settings when you start up the new files for the first time.
- Open another Command Prompt for Windows or Terminal for MacOS.
- Use the change directory command. Enter “cd” followed by the path to your Minecraft server folder. The command line should update to the new file location, ensuring it’s looking for your .jar file in the right folder.
- Start the server by entering the command “java -jar server.jar –nogui”.
Changing the EULA Agreement
The server won’t launch Minecraft unless you agree to the EULA (end-user license agreement).
- Jumping from the previous step, stop the server by entering the “/stop” command.
- Find the eula.txt file and open it with any text editor.
- Change the “eula=false” line to “eula=true”.
- Save and close the text editor.
TIP: If you can’t save server properties, run Minecraft as an administrator.
Making Your Minecraft Server Operational
You now have the important Minecraft files and the newest version of Java. Next, it’s time to run your free Minecraft server and perform port forwarding so others can connect to it.
Running the Server
After downloading the Minecraft files, Linux users can begin running the server.
- Type “java -Xmx512M -Xms512M -jar minecraft_server.jar nogui” and hit enter (Change the -Xmx and -Xms parts to adjust how much memory you want to allocate for the server.)
- Stop the server using “stop” to ensure that everything is running properly.
- Edit the server.properties file and set “enable-query=true”. Save the text document and restart the server.
- Enter your IP address into the Minecraft Server Status Checker to see if your server is publicly accessible.
For Mac and Windows users, the process is a bit longer.
- Enter the command “java -jar server.jar” to open the prompt to allow the server software through the firewall.
- A server graphical user interface (GUI) should run alongside the server.
- On the main menu, click “Multiplayer,” then choose between “Direct Connection” or “Add Server.”
- If you chose “Direct Connection,” type “localhost” in the server address and click “Join Server.” If you chose “Add Server,” fill in the “Server Name” field with your server name. Then, click “Join Server.”
Setting Up Port Forwarding
You should first know that setting up port forwarding for Minecraft isn’t an inherently dangerous process. However, it can be a security risk since you’re opening access to your WiFi router.
As such, port forwarding is only good for small servers between close friends and family.
However, this is also only applicable to Mac and Windows users.
- Log into your router and locate the Port Forwarding section.
- Add a new Port Forwarding option and name it something obvious, such as “Minecraft.” You might also have to input your machine’s IP address.
- Identify the internal and external port numbers and fill them in. Minecraft’s default port number is 25565.
- Players should now be able to connect to your Minecraft server when they enter your external IP address under “Server Address.”
For Linux, you should point a domain to your free Minecraft server.
Simply update your domain’s DNS records by adding an “A” record for your domain or subdomain pointing to your server’s IP address.
Keep in mind that it can take up to 24 hours for the DNS changes to take effect worldwide.
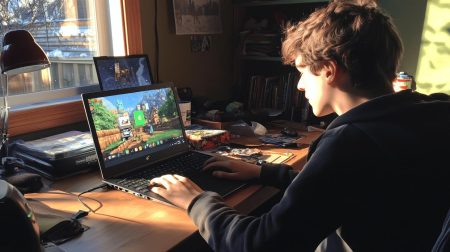
Connecting to Your Server
After port forwarding, find your external/public IP address since players will need it to connect to your server.
Players can join your server with the steps below.
- Choose “Multiplayer” in Minecraft and click “Add server.”
- Enter your server name.
- Enter your server address. You can find your external IP address by searching “my IP address” on Google. If it’s an IPv4, copy-paste as is. If it’s IPv6, put square brackets “[]” around it.
- Click done. Players should now be able to connect to your server and click “Join server.”
NOTE: If you’re experiencing problems, enter your external IP address into the Minecraft server status checker to see if your server is accessible.
You can also set up an automatic script file for Windows and Mac, so you don’t need to run Command Prompt or Terminal every time you launch the server.
For Windows users, follow the steps below for the batch file.
- Create a new text file in your Minecraft server folder. Rename the file to “start.bat” and click yes when Windows warns you about changing the file extension.
- Right-click the file and select Edit.
- Type the command “java -Xms1G -Xmx1G -jar server.jar” then save and exit the Notepad document.
For Mac users, follow the steps below for your shell scripts.
- Make a new text file in the Minecraft server folder. Rename it to “start.sh” and open it.
- Type the following command:
#!/bin/sh
cd “$(dirname “$0″)”
exec java -Xms1G -Xmx1G -jar server.jar - Save the file, then open Terminal. Use the change directory command to point Terminal to the right folder.
- Run the command “chmod a+x start.sh” to make the start.sh file executable.
- After making the required command file, just double-click it so the server starts automatically.
Options for Free Minecraft Server Hosting
You can open your own private server to more players through server hosting.
We may have mentioned above that you usually need to pay for a hosting provider. However, you can see our quick free Minecraft server services comparison to find the right provider if you’re on a budget.
Overview of Aternos
Aternos is a well-known provider of on-demand Minecraft servers. In fact, it caters to at least 77 million players worldwide.
The provider is completely funded through ads, so it’s free for users.
To set up a free Minecraft server on Aternos, just create a free account, add a server, then configure it however you wish.
Using Other Free Minecraft Server Services
Another free Minecraft server service is Minehut.
It’s a freemium (free premium) server that provides users with unlimited plugin slots, a maximum of 10 players, and 1GB of allocated RAM. You can even toggle server properties!
With Minehut, your Minecraft servers can be viewable to at least 250,000 monthly users that pass through the lobby.
However, if you want to improve your server, you’ll have to buy a plan.
Tips for a Smooth-Running Minecraft Server
After you create your free Minecraft server, you’ll need to ensure it keeps running smoothly even when it’s already in use.
Regular Upgrades of the server.jar file
One of the surest ways to allow optimal performance is to always update your server software.
That’s because updates will fix bugs, improve security, and add new features that may help optimize your server even more.
Doing so will also ensure that your software is compatible with the latest version of Minecraft.
Optimal Server Settings
You shouldn’t be afraid to tweak your Minecraft server properties to optimize the server.
For instance, optimizing tick speed can control how often the server updates and processes events.
Meanwhile, reducing render distance lowers the number of loaded chunks by adjusting the distance at which players see the world.
How to Create a 24/7 Minecraft Server for Free
Unless you only play Minecraft with friends and family at certain times, you’ll want your server to be up and running 24/7.
Steps to Keep the Server Running 24/7
You can keep the server running with your own hardware. However, you may need an old spare PC that will serve as your dedicated Minecraft server.
The server will keep running as long as you host it.
This may not be feasible for everyone — so you should also discover best Minecraft server hosting choices to keep your server running even if you don’t have the hardware for it.
If that’s the case, choose a server service provider, make an account, and hook up your server from there.
Precautions and Requirements
Hosting from your home network is unsafe since you’re running the server from your own machine. This exposes your home WiFi to the public.
Plus, you’ll need a dedicated personal computer to keep your server running.
If you’re using server services, pay attention to features like DDoS protection, server backups, and good customer support.
Frequently Asked Questions
Do you have more questions on how to create a Minecraft: Java edition server? We’ve answered some of them below.
Can I Create a Minecraft Server for Free to Play With My Friends?
Yes, you can create a free Minecraft server and let your friends join your server.
You can do this on your home network since you’ll expose your WiFi to trusted people.
How Can I Make My Minecraft Server More Secure?
If you’re using your own hardware, you’ll need a pretty good grasp of cybersecurity to stop problems like DDoS attacks.
One way to make your own private server more secure is to look for a reliable server hosting service.
Check their security features to see if they can make your server as safe as you want.
How to Troubleshoot Common Problems When Setting up a Minecraft Server?
It’s a delicate process to set up a Minecraft server. You’re giving your computer commands to follow, so you’ll need to pay attention to details.
If you keep encountering errors, read and redo the instructions.
But if you’re having trouble because of the free Minecraft server hosting provider, contact their customer support.
What Are Some Other Platforms Like Aternos to Host Minecraft Servers for Free?
Aternos is only one of the many free Minecraft server hosting services out there. You can also try:
- Minehut
- Minefort
- ScalaCube
- Falix
How to Handle Downtime for a 24/7 Minecraft Server?
If you’re using a free Minecraft server hosting service, contact customer support. However, these servers boast high uptime, so you shouldn’t have much of a problem with them.
If you’re running on a home server, determine if it’s a PC-related problem or not by running your repair tool.
If it’s not PC-related, see if it’s game-specific. If you can’t connect to your server, you might be running outdated server hardware. See if there’s a newer version and install that.
If even that doesn’t work, disable your firewall or antivirus software. After that, sign in and out of your Minecraft account and restart your machine.
If you still have problems, reset your modem.
Conclusion
Playing Minecraft can be more enjoyable when you share your Minecraft world with other users.
It can be even more fun if you’re running your own server since that means you can toggle many of the settings from your control panel.
We’ve mostly covered setting up Minecraft Java edition servers, where the most important step is ensuring you have the newest version of Java.
Setting up your own Minecraft server may require some technical know-how, but it’s easy and manageable if you follow instructions carefully.
If you don’t have the hardware for running a server or want to let strangers join your server, there are free server hosting providers that you can turn to.