The World of Modded Minecraft Servers
PositiveCreating a modded server for Minecraft is an exciting way to enhance your gameplay. Download the Forge or Fabric mod loader, then install the desired mods onto your server. Customize settings and invite friends to join you in this immersive and personalized Minecraft experience.
- What is a Modded Minecraft Server? A modded Minecraft server refers to a customized version of the popular game that allows players to add modifications or “mods” to enhance their gameplay experience. These mods can range from simple additions like new items or blocks to more complex changes such as entirely new dimensions or gameplay mechanics.
- Benefits of Creating Your Own Modded Minecraft Server Creating your modded Minecraft server opens up a new world of possibilities for you and your friends. Here are some key benefits:
- Customization: With a modded server, you can control which mods are installed, allowing you to tailor the gameplay experience according to your preferences.
- Enhanced Gameplay: Mods can introduce exciting features and content unavailable in vanilla Minecraft, adding depth and variety to your adventures.
- Community Building: Running a modded server allows you and your friends or online community members to come together, learn and collaborate on unique projects within the game.
Choosing the Right Mods for Your Modded Minecraft Server
Now that we’ve covered the basics of what a modded Minecraft server entails and its benefits let’s move on to section two, where we’ll delve into choosing the right mods for your server!
- Compatibility Before installing any mods, it’s essential to ensure that they are compatible with each other. Some mods may conflict or cause issues if not properly integrated, so be sure to research and test compatibility before adding new mods.
- Popular Mods and Their Features A wide variety of mods are available for Minecraft, each offering unique features and enhancements to the game. It’s important to familiarize yourself with popular mod categories such as Technology Mods (advanced machinery and automation systems), Magic Mods (spells, enchantments, magical creatures), Exploration Mods (new biomes, structures, ores), and Adventure Mods (quests, dungeons). Choose mods that align with your vision for the server.
- Modpacks vs Individual Mods When it comes to installing mods on your server, you have two options – using pre-made modpacks or selecting individual mods.
- Modpacks: Modpacks offer a curated collection of compatible mods that work seamlessly together, saving time but potentially limiting customization options.
- Individual Mods: Selecting individual mods allows for more flexibility in creating a custom experience tailored specifically to your preferences but requires careful consideration of compatibility between chosen modifications.
Choosing the Best Hosting Provider for Your Modded Minecraft Server
Selecting the perfect hosting provider is crucial in creating your modded Minecraft server. The right provider will ensure that your server runs smoothly and provides an enjoyable gaming experience for you and your friends. Here are some key factors to consider when choosing a hosting provider:
- Performance Look for a hosting provider with high-performance servers with fast processing speeds and ample RAM. This will guarantee smooth gameplay without any lag or delays.
- Uptime Choosing a hosting provider that guarantees excellent uptime is important, meaning your server will be up and running consistently without frequent interruptions or downtime.
- Customer Support Opt for a hosting provider that offers reliable customer support services, preferably 24/7 live chat or ticket support. This way, if you encounter any issues or need assistance with your server, help is just a click away.
- Scalability Consider the scalability options the hosting company provides so you can easily upgrade your server resources as needed.
- Pricing While cost shouldn’t be the sole determining factor, finding a balance between quality service and affordability is essential.
Comparison of popular hosting providers:
| Hosting Provider | Description |
|---|---|
| ScalaCube | Known for its user-friendly interface and quick setup process, ScalaCube offers instant setup of modded Minecraft servers with unlimited slots at competitive prices. |
| Apex Hosting | With its easy-to-use control panel and top-notch customer support team, Apex Hosting is another popular choice among Minecraft enthusiasts. |
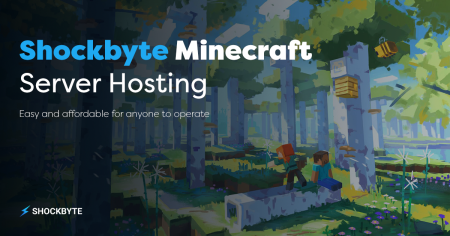
| Shockbyte | Offering affordable plans with great performance capabilities, Shockbyte ensures smooth gameplay even during peak hours. |
| BisectHosting | Known for its reliability and excellent customer service reputation within the Minecraft community. |
| GG Servers | GG Servers provides many modpack options and reliable hosting services with low latency. |
Having reliable customer support is crucial when running a modded Minecraft server, as it can save you time and frustration when encountering technical issues or needing assistance installing mods. Additionally, uptime is essential for providing uninterrupted gameplay to your players.
Setting Up Your Modded Minecraft Server
Embarking on setting up a modded Minecraft server is an exciting and rewarding endeavour. By carefully selecting the right mods, you can enhance your gameplay and craft a unique gaming environment for yourself and your fellow players. Here’s a step-by-step guide to help you through the process:
- Choose Your Mods Before diving into setup, choose mods that align with your preferences and desired gameplay experience before diving into setup. Consider factors such as theme, functionality, compatibility with other mods, and popularity within the Minecraft community.
- Install Forge You’ll need to install Forge on your computer to run modded servers. Forge is a popular modding platform allowing you to add custom content to your game easily.
- Download Mods Once Forge is successfully installed, it’s time to download the mods you want for your server from reliable sources like CurseForge or PlanetMinecraft.
- Create a New Folder Set up a new folder on your computer where all server-related files will be stored – something memorable like “ModdedMinecraftServer”.
- Copy Server Files Locate the downloaded Forge installer file (.jar) on your computer and copy it into the newly created folder (“ModdedMinecraftServer”). Double-click this file to start installing Forge into that folder.
- Run Server Installation After running the installer file, look for “forge–universal.jar” in “ModdedMinecraftServer”. Rename this file to “server.jar” for simplicity.
- Configure Server Properties Open the “server.properties” file in the server folder using a text editor and customize various settings according to your preferences.
- Install Mods on the Server Add all downloaded mod files to the server directory’s “mods” folder.
- Start Your Server Double-click the “server.jar” file within your server folder to start up your modded Minecraft server via the command prompt window.
- Troubleshooting Common Issues If any issues arise during setup or while running your modded Minecraft server, seek assistance from experienced players who have encountered similar issues or check online forums dedicated to Minecraft for solutions.
By following these steps carefully, you’ll be well-equipped to create an exciting customized gaming experience for yourself and others by hosting their unique modded Minecraft servers!

