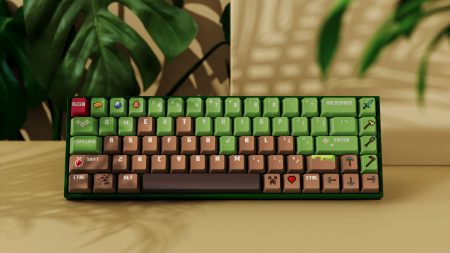
Mechanical keyboards are arguably the best option for most people, whether for gaming, long hours of typing, or other professional setups. While they cost more than membrane keyboards, they are a great return on investment. One of their advantages is their ease of repair and customization. Investing in a hot-swappable mechanical keyboard allows for even faster removal and replacement of the switches. This guide shows you how to do it for hot-swappable keyboards, as well as for soldered keyboards.
What Is a Hot-Swappable Mechanical Keyboard?
A hot-swappable keyboard allows you to quickly remove its switches since they are held in place on the PCB by hot-swappable sockets. They differ from other keyboards since traditionally, switches are soldered onto the PCB. Therefore, the hot-swappable sockets speed up repair and customization exercises.
It’s worth noting that virtually all hot-swappable mechanical keyboard switches are compatible. This universal application allows for even greater levels of customization, ease of repair due to readily available alternatives, and much faster setting up of your keyboard. These switches are either 3-pin or 5-pin, with the 3-pin universally applicable, and the 5-pin easily altered to fit 3-pin PCBs.

How to Quickly Swap Out Your Keyboard’s Switches
Swapping switches on your keyboard is usually for repairs, to alter its looks, to upgrade your switches for a better typing experience, or to align with a specific theme in your workstation or gaming rig setup. Here are the simple steps you need to follow:
Collect Your Switches
Before removing the existing switches on your keyboard, you need to first get the replacement switches. Whether you’re replacing a broken, malfunctioning, or differently designed one, you should proceed only if you have the right replacement. This move makes for a neater swapping experience and gets you back to typing in no time. While shopping for replacements, ensure they are compatible with your keyboard’s PCB. Therefore, check whether they are 3-pin or 5-pin compatible. A 5-pin keyboard accepts any switches, while a 3-pin one requires a little work on the 5-pin switches to get them working.
Use a Keycap Puller to Remove the Keycaps
The best way to remove the keyboard switches is to first use a keycap puller on the keycaps, which ensures safe removal and minimizes the chances of damage. You could remove them with your fingers, but they may not fit. Additionally, they will prove clumsy if you’re aiming for the keycaps in the middle of the keyboard or other hard-to-reach sections. A keycap puller works well to grab the keycaps in such sections.
Ensure that you pull the keycaps gently and wiggle them just a little to get them safely off. Pulling the keycaps fast and forcefully could ruin their stem or bend the pins on the switches, thus damaging them or the PCB underneath. Therefore, be careful as you pull the keycaps out. Once done, you’ll have easier access to the switches.
Use a Switch Puller to Remove the Switches
Hot-swappable switches on a mechanical keyboard have two tabs on either side for ease of removal. You’ll need to use a switch puller to hook on either tab, then squeeze the puller to release the tabs that hold the switch to the PCB. Once released, you’ll pull the switch upwards, thus removing it. Remember to also be gentle in this stage, to avoid damaging the switches or PCB underneath.

Install the New Switches
Once you have safely removed the old switches, you can install the new ones you had earlier collected. Ensure you line each switch correctly before pressing them down into place. You should feel the tabs click or slide into place. Do not press down on the switches if they are not properly aligned, as that will bend the switch pins, or worse.
Install the Keycaps
You could then reinstall the keycaps you removed earlier, or opt for a new design if you have some. Whichever your preference, ensure that the keycaps are also properly aligned on the switches before pressing down. Additionally, ensure you have each keycap in its right place, to avoid confusion as you type.
Plug in and Test the Keyboard
You’ll need to check whether you did a correct installation job by plugging in your keyboard to your CPU and testing each key. Ensure you run this test immediately, so you can make any changes while you still have the time and necessary tools. You don’t want to later find out you placed a keycap on the wrong spot, or one of your switches is damaged. Pay attention to the typing feel, which tells you if all switches and keycaps are aligned properly.
Conclusion
Swapping switches on a mechanical keyboard is one of the input device’s strongest advantages. You won’t need to replace the entire keyboard when a few keys malfunction, and you can customize its look and feel. This article shares how to remove the switches from your keyboard and get on with your repair or customization process.