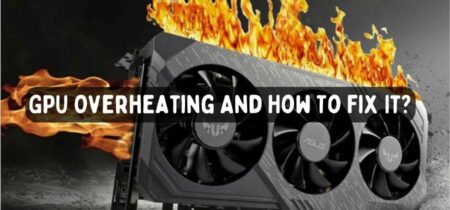
When you’re frequently overclocking your GPU while gaming, you will most likely observe a warning that mentions “GPU Voltage Limit Reached” and you might even begin to notice performance imbalance, artifacts, distortions, and other issues. Raising the voltage enables for better clocking, but you have to follow some safety measures as well.
If you exceed the maximum voltage limit and continue gaming or performing heavy tasks, you’re on the verge of inflicting permanent damage to your GPU. You could either entirely burn it right from the very beginning or have a consistent pain of decreased performance output.
Both outcomes are something you most likely wouldn’t want to face. Though certain cards have some flexible zone, it’s still recommended to immediately stop whatever you’re doing once you see this alert.
So, if you’re looking for a way out from this but don’t have enough knowledge, then worry not! this ultimate guide is all you need!
In this article, you will get to know about all the crucial factors regarding the GPU voltage limit, aspects of overclocking, how to safely enhance it, and more.
So let’s get started!
What is Voltage?
Voltage is the amount of energy that your CPU receives while you operate your computer. The level of power used by the CPU is directly associated with the level of heat it produces and the level of voltage it consumes.
When developing and executing, the “voltage identification definition” or VID is employed, which defines how much voltage your CPU requires to manage stability at default clock rates.
Within this default area, you’re unlikely to see a voltage limit notification alerting you about the voltage limit reached unless it has another problem that is limiting functionality, such as having very few cores activated or overclocking it.
The core voltage varies from processor to processor (while there is some association among companies). Even though all CPUs have varying voltage frequencies and clock rates, they all include the exact core frequency or VID.
However, there are minor differences in silicon composition that affect clock rates and voltage limits. It won’t notice that much impact, but it will make a slight difference.
When you utilize your CPU, the voltage level generally remains consistent. It will only vary if you are extreme gaming, overclocking, or doing some other type of intense task.
There are various methods for increasing and maintaining voltages, and they could be fairly helpful in minimizing stutters, artifacts, and other problems that imply you’re reaching your GPU voltage limit.
The benefit is that these artifacts will not appear at increased framerates because of slowdowns generated by inadequate speed-related capabilities accessible on the lower-end graphics cards that just have one core rather than two.
What Happens if You Increase the GPU Voltage Limit?
Increasing the voltage allows for a higher clocking speed (exactly how it works on CPUs), but it comes at the cost of additional heat and power consumption.
As increasing the voltage accelerates power usage which adds up more heat, your card might end up clocking down to avoid overheating problems and be within its power limitations.
Several of the latest cards automatically analyze their current power usage and seamlessly modify clock speeds to keep the card safe and functional. In addition, if you have an NVIDIA’s graphics card, you already have around 15% more room to overclock it than you expect.
If you exceed the GPU voltage limit, you don’t have to figure out something for it. The card clocks down accordingly to remain under its power constraints.
Even though you haven’t crossed the GPU voltage limit, if the card gets overheated, it will do the same thing to protect and maintain itself.
This also ensures a lower risk of burning out any components during an effort at higher configurations than planned without careful supervision.
If you’re employing Afterburner in games, you can observe that your graphics card is not consistently clocking to the top, based on the game you’re currently playing.
The smart move you can make if you’re facing performance imbalance or stutters during your gameplay sessions is to back away before you strain it to go even further.
Must Read: CPU Temperature Jumping Up And Down
You don’t need to step down quite much though, start to go down by 10 Mhz and check if it resolves; if the issue is still there, then continue to go down additional 10 Mhz till you don’t spot any problems in your gameplay or receive any warnings.
You need to circumvent the power constraints via hardware while increasing its limit and allowing more voltage in your GPU. But, it’s wise to consider some safety measures if you’re consistently straining your PC.
If you have money to burn and do not care, you can invest in a specialized cooling system and liquid cool the card and its regulators.
Will it Shorten the GPU’s Lifespan?
Certainly not except if you play mostly in high temperatures straight for more than 6 hours each day. As soon as your bearings wear out, the cooling fans will become unsteady and noisy.
Generally, it takes 3 to 5 years for the need to change the fans but overclocking might decrease this time by about 1.5 to 2 years instead.
There’s no chance for actually determining it because every brand’s fan architecture and cooling circuit layout is differently built.
How to Prevent Voltage Limit Burnout
Most extreme gamers prefer to overclock their GPU when necessary to maximize their gaming on the highest settings.
Though, you will have to go through a number of methods to achieve this, including installing software and modifying your voltage settings.
You need to open MSI Afterburner Settings and do the following:
1. In MSI Afterburner, go into the “General” tab
2. Make sure to enable the mentioned options:
• Unlock Voltage Control
• Unlock Voltage Monitoring
• Force Constant Voltage
3. Click on the “OK” button
4. Restart the PC
5. Reload MSI Afterburner after your PC has restarted. You’ll also have to use a benchmark checking app to strain test your PC.
6. Set your temperature limit at around 87° Celsius. It will make the power limit slider to move higher simultaneously.
7. Move the “Core Voltage Slider” completely towards the right. No need to worry about its precise details as you will be able to see a specific percentage based on your GPU.
8. Click on the “Check” button under the sliders.
Once you shift to these configurations, you will reach the maximum clock speeds while maintaining a reasonable temperature zone and without getting the GPU voltage limit reached warning.
How to Increase the GPU Voltage Limit
There are some methods you have to implement to modify your GPU voltage limit.
You will have to access the BIOS of your motherboard and execute some particular tweaks. There is a three-decimal value that needs to be changed. It’s generally about 1.235v.
This voltage limit is incorporated by default but you can modify it by inputting any value into this area. Keep in mind that there is no need to go further than the suggested limit for your CPU, or you will run into severe issues.
You have to discover the base value for your computer before you locate the ideal value for your requirements.
This could differ depending on the model and architecture but you can generally get the specific number by doing a bit of research on the internet.
Several manufacturers will mention the voltage necessary to maintain a stable performance. All CPUs are unique, so you will have to try and experiment to figure out what works best for you before taking the high ground.
However, if you have already begun with these settings, you’re extremely close to your main objective.
After you’ve got the ideal value, you will have to reboot your computer. If there are no stability problems, you can continue to lower the voltage. While overclocking, you need to keep the voltage as low as possible to maintain stability.
Continue to reduce the voltage by 0.01v and keep reducing it until your system begins to display signs of instability. You have to strain test your system to check that you are not causing any harm.
The voltage might have to be increased further if the benchmark testing crashes or fails. Rather than tweaking by 0.01v, try increasing it by 0.005v until you obtain reliable performance.
Overclocking and Performance Limit Reliability Voltage
When it’s about boosting your CPU’s clock frequency rate and achieving high performance, you can only do so much.
When you approach the performance limit reliability voltage, you begin to notice occasional instability.
Applications will begin to crash or stop, gaming performance will degrade, and you can even have to face some difficulties in powering up your computer.
This is because your CPU has reached its limit and has taken sudden precautions to protect itself.
Keep in mind that more voltage equals higher heat, which could easily damage your system. Temperatures should always be kept under control.
Is it a Smart Move to Undervolt?
You might not have to be concerned over your GPU voltage limit on some occasions as you would rather choose to undervolt it.
Certain CPU models contain a higher voltage level than what is needed. Regardless of frequency, increased voltage levels will end up causing your processor to draw up more heat.
Undervolting can highly assist you in lowering temperatures, maintaining the stability of your system, and extending the longevity of your processor (including other components.
This can be your safest solution if you’re searching for a spot to cool off your PC. It’s much better than turning off specific functions or having to implement a specialized cooling system.
Check out our separate post if you don’t know what should be your normal CPU Temperature while gaming.
Conclusion
The wrap up this guide, I would suggest you to be extremely cautious while overclocking and reaching the GPU voltage limit. Forcing your computer beyond its limit will lead it to break or cause permanent damage to the delicate components.
The ideal strategy is to prevent exceeding the GPU voltage limit and to pull off instantly when you do. Although, as it’s not easily attainable for everybody, you have to follow recommended practices mentioned in this guide before deciding how you should continue.


